DIY DTF transfers have transformed home crafting by delivering vibrant, durable designs that don’t require a photo-printing studio, empowering hobbyists to create personalized apparel, bags, and decor right from their kitchen or workshop. If you’re a hobbyist eager to customize items with crisp color and a soft hand feel, this introductory guide provides a clear framework for understanding the DTF transfer process. Although the technique can seem intimidating at first, the included tips simplify steps like design preparation, film handling, powder curing, and heat-press timing, making the concept approachable for beginners. By selecting the right materials—DTF-ready film, adhesive powder, and a dependable heat source—you’ll control color accuracy, transfer durability, and fabric compatibility, whether you’re crafting for gifts or testing small home-business ideas. The guide also links practical concepts like DTF transfer step by step and related topics such as DTF printing for beginners and how to make DTF transfers at home to help you search and learn efficiently.
From a broader perspective, this process is essentially direct-to-film printing for textiles, where digital artwork is captured on a specialized film and bonded to fabric with heat. Using terms like film transfer workflow and heat-press design transfer helps readers relate the technique to other fabric-printing methods, while emphasizing durability and vibrant color. LSI-minded framing also invites comparisons with traditional screen printing, sublimation, and iron-on options, highlighting where DTF-based methods fit in a modern, at-home crafting toolkit.
DIY DTF transfers: A Beginner-Friendly Path to Custom Garments
DIY DTF transfers empower crafters to create vibrant designs at home without needing a photo-printing studio. This approach blends digital design with the durability of heat-applied prints, delivering strong color and a soft hand-feel on many fabrics. For beginners, the whole workflow—from artwork to transfer film to powder to heat press—feels approachable and scalable.
Starting with DIY DTF transfers requires a core set of tools and a patient mindset. You’ll need a printer compatible with DTF film, adhesive powder, a heat source, and a smooth workspace. As you practice, you can experiment with light fabrics, dark fabrics with a white underbase, and different finishes. If you’re curious, a DTF transfer tutorial and community tips can guide you through common pitfalls and best practices.
Begin by allocating a small practice space and working on swatches before committing to garments. Keep a log of settings and fabric types to build a personal reference library for future projects. With steady practice, you’ll gain confidence and start designing custom apparel, bags, or home decor using DIY DTF transfers you can create entirely at home.
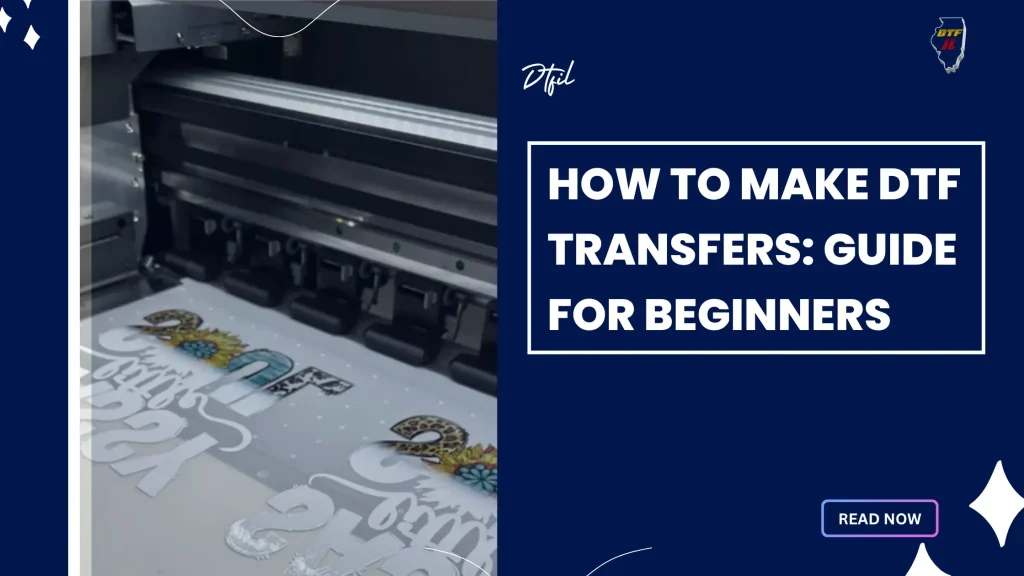
DTF transfer step by step: From Design to Durable Wearables
A DTF transfer step by step workflow starts with design, then printing and powder curing, leading to the final transfer on fabric. You mirror the image, print the base and color layers, and then apply adhesive powder to prepare the film for bonding. Following these steps helps ensure clean edges, accurate colors, and a durable final result.
Next comes fabric preparation, heat pressing, and a careful peel to reveal the finished image. The step-by-step process emphasizes consistency: the right temperature, duration, and pressure are crucial for repeatable results. If you’re learning, consult a DTF transfer tutorial and practice on swatches to fine-tune your settings before working on real items.
After pressing, allow the print to cure and cool properly, then follow care guidelines to maximize wash-fast performance. Regularly testing turnaround times and color density on different fabrics will help you refine the process. Watching your designs come to life through this DTF transfer step by step journey reinforces why many hobbyists love fabric printing.
DTF printing for beginners: Essential Tools, Setup, and Practice
DTF printing for beginners starts with selecting the right printer, compatible DTF film, and a reliable white underprint option. A basic toolkit includes a printer, DTF-ready film, white ink or underbase, color inks, adhesive powder, a heat source, and protective sheets. Setting up with these essentials makes it easier to translate digital designs into vivid transfers on fabrics.
With a comfortable workspace, you’ll move from design to test prints quickly. Use simple designs and swatches to compare color density, edge sharpness, and fabric compatibility. For ongoing learning, treat this as a hands-on DIY project and explore resources like a DTF transfer tutorial or beginner-friendly projects that show how to make DTF transfers at home.
As you gain proficiency, document your results, test on different fabrics, and refine your workflow. Keep notes on ink density, powder application, and curing times to build repeatable success. This practical approach to DTF printing for beginners turns curiosity into reliable, high-quality results you can repeat with confidence.
DTF transfers on fabrics: Best Materials, Color Strategies, and Care
DTF transfers on fabrics perform best when you match the design to the fabric type. Light-colored cottons and blends typically yield bright results, while polyester and poly-blends handle high-durability prints for athletic wear. When working on dark fabrics, plan a white underbase to preserve color vibrancy and legibility.
Color strategy matters: test edge sharpness, saturation, and bleed control on fabric swatches before finalizing a garment. Use swatches with the same fiber content and weave as your project to predict how the transfer will behave. This is where a DTF transfer tutorial can help you optimize color density and layer order for best results on fabrics.
Care and aftercare also influence durability. Turn garments inside out, wash in cold water, and air-dry when possible to extend the life of your DTF transfers on fabrics. Storing your designs flat and away from humidity reduces warping and keeps colors vivid across multiple washes.
How to make DTF transfers at home: A Practical Home Studio Setup
How to make DTF transfers at home starts with a dedicated, organized space and reliable equipment. Create a clean workspace with a flat surface, dust-free environment, and space for printing, powder application, curing, and pressing. A simple setup can scale up as you gain experience, staying within a home-friendly budget while still producing professional results.
Begin with a practical workflow: design, mirror print, apply adhesive powder, cure, position on fabric, press, and peel. This home-based DTF workflow keeps steps tight and repeatable so you can reproduce favorites across many projects. For ongoing learning, consider following a DTF transfer step by step guide and practicing with varied fabrics and garment types.
To protect your investment and maintain results, establish a basic care routine for your films and finished items. Label and archive designs, test on swatches, and document temperature and time settings for future projects. A well-documented home studio workflow helps you turn casual experimentation into consistent, repeatable DTF transfers at home.
Frequently Asked Questions
What is covered in a DIY DTF transfers tutorial and how can it help beginners?
A DIY DTF transfers tutorial typically walks you through the entire workflow, from concept to finished print, and is designed for home crafters. It covers what DTF transfers are, the essential materials, and a practical DTF transfer workflow, including designing, mirroring, printing, applying adhesive powder, curing, pressing onto fabric, peeling, and care. The goal is to build confidence for beginners exploring DIY DTF transfers.
How to make DTF transfers at home: what do I need to get started with DIY DTF transfers?
To learn how to make DTF transfers at home, start with a basic setup: a printer capable of DTF ink, DTF film, white and color inks, adhesive powder, a heat source (heat press is ideal; an iron can work for practice), protective sheets, and design software. The process generally follows: design, mirror, print, apply and cure the adhesive powder, prepare the fabric, press and peel, then cure and care. Practice with swatches before larger projects.
What should a beginner know about DTF printing for beginners when learning DIY DTF transfers?
DTF printing for beginners emphasizes simple designs, reliable equipment, and careful fabric handling. Start with a beginner-friendly setup, use a heat press for consistent results, and choose fabrics like cotton or cotton blends for bright colors. For dark fabrics, plan a white underprint. Practice with swatches and follow manufacturer guidelines for temperature and time to build confidence with DIY DTF transfers.
Which fabrics work best for DTF transfers on fabrics and how should I optimize results with DIY DTF transfers?
DTF transfers on fabrics perform best on cotton, cotton blends, and polyester. Dark fabrics usually require a white underprint to maintain color vibrancy. Preheat the fabric to remove moisture, align the film, and press at the recommended temperature and time. Monitor for issues like color bleed or edge lifting, and adjust pressure and duration as needed. Proper curing and post‑care extend the life of your DIY DTF transfers.
What is the DTF transfer step by step process for DIY DTF transfers?
DTF transfer step by step for DIY projects generally follows six stages: Step 1 prepare your design; Step 2 print the design; Step 3 apply adhesive powder and cure; Step 4 prepare the fabric and position the film; Step 5 press and peel; Step 6 cure and finish care. Remember to mirror the image, print with appropriate underprint if needed, and follow material guidelines for temperature, time, and pressure to ensure durable results.
| Topic | Key Points |
|---|---|
| What are DIY DTF transfers? | Direct-to-film transfers: print design on film, apply adhesive powder, cure, then transfer with heat. Durable, full-color images on many fabrics; ideal for home crafters without a studio. |
| Benefits | Vibrant colors; soft hand-feel; durable through many washes; supports full-color designs; works on various fabrics; cost-effective for at-home projects. |
| Materials needed (beginners) | Printer, DTF film and PET film, DTF transfer sheets, white and color inks (or white underprint), adhesive powder, heat source (heat press recommended), protective sheets, heat-resistant mat, design software, practice fabrics. |
| Step-by-step workflow (overview) | Design, print, apply adhesive powder & cure, prepare fabric & transfer, press & peel, curing and finish care. Follow manufacturer guidance for best results. |
| Step 1–3: Design & Print | Prepare high-res design (300 dpi, mirror), print with appropriate settings, verify alignment with a test sheet. |
| Step 4–6: Transfer & Finish | Preheat fabric, align film, press at recommended temp/time, peel (hot/cold per guidance), cool and wash-care guidance. |
| Tips for success | Practice on similar fabrics; follow temperature/pressure guidelines; test on swatches; use light backgrounds for planning; store films flat and dry. |
| Common issues & troubleshooting | Faint colors, peeling edges, cracking, smearing—adjust ink density, underprint, heat/pressure, and ensure film is dry before powder. |
| Fabric/design ideas | Suitable on cotton, blends, polyester; white underprint for dark fabrics; experiment with textures for shirts, bags, or home decor. |
| FAQ | Is this beginner-friendly? Yes. Iron can work for experiments; heat press provides consistent results; durability is strong with proper curing and care. |
Summary
DIY DTF transfers empower home crafters to produce vibrant, full-color designs on fabric with a workflow that balances accessibility and professionalism. This step-by-step approach helps beginners build confidence, refine technique, and unlock creative potential for apparel, bags, and home decor. By mirroring designs, using reliable inks, and applying heat and pressure correctly, you can achieve durable results that endure repeated washing. With practice, DIY DTF transfers can become a versatile hobby, a small business, or a creative outlet for personalized gifts.